So as most of you know, I have a little bit of a polish obsession. As I was staring at my homely looking house keys last night I thought, "What could possibly liven these babies up? Ooooooh yes, nail polish!" So that's what I did! And I gotta say, I am
SO happy with them! They're so cute and girly.
If you don't like the "cute and girly" look, then throw your favorite sports team's colors on them or create some cool pattern! Let your imagination run wild.
Here they are. My boring house keys. Go ahead and grab yours and let's get started!
Step 1: Take some alcohol on a cotton swab and run it over your keys. Your keys can have lots of oil and dirt on them from constantly being handled and you'll want a nice clean surface for your polish to stick to.
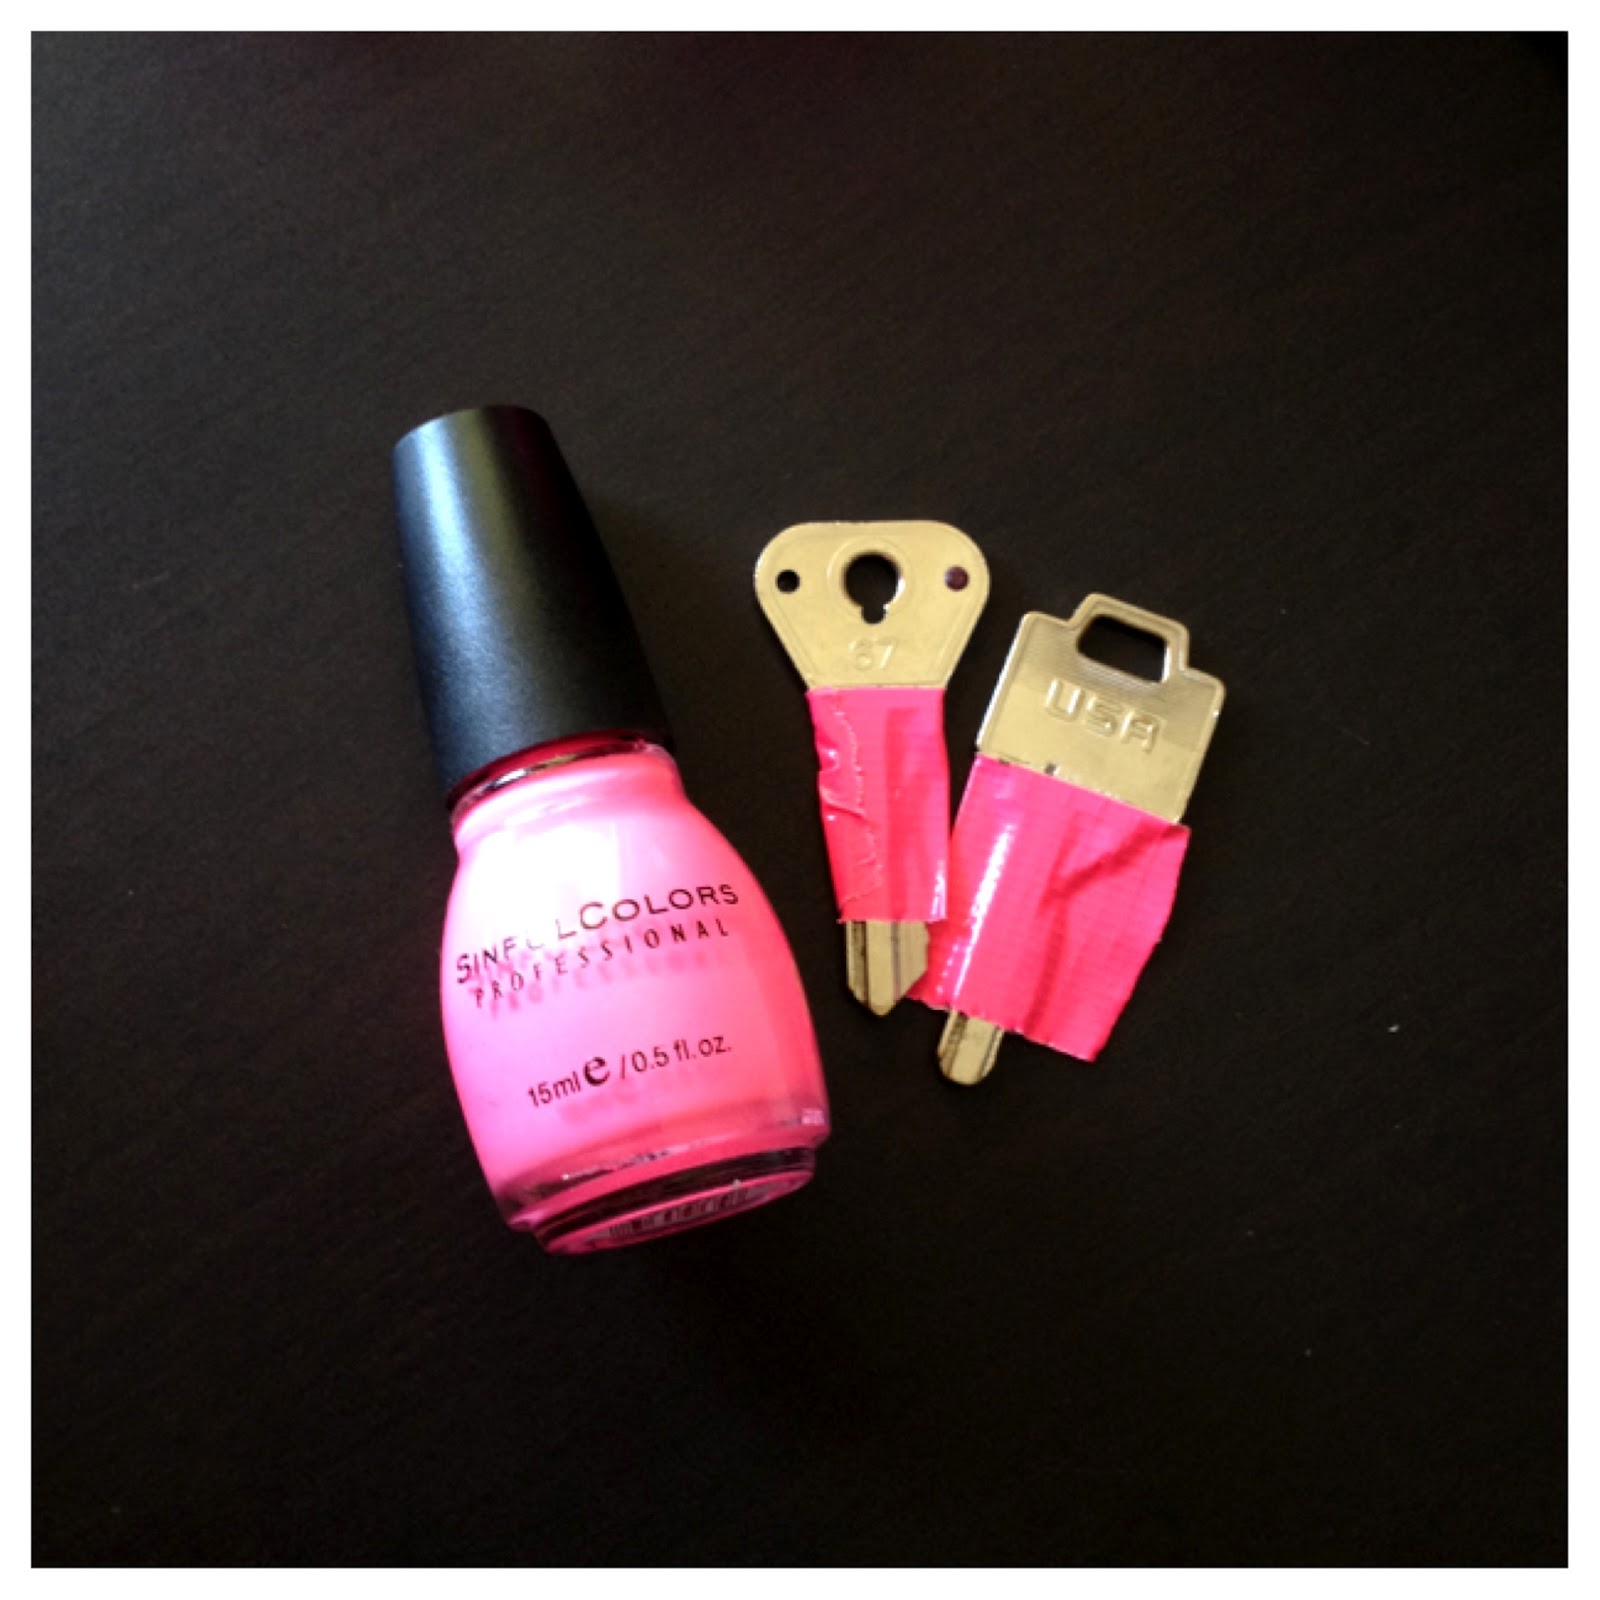
Step 2: Use any sort of tape you have and tape off the bottom portion of your key. If you have a steady hand then you can totally skip this step! This is a guide to make sure that you have a nice clean line when you're finished painting.
Step 3: Choose a color that you would like as the base. I chose Sinful Colors- 24/7. It's a bright neon pink and it's only $1.99 at Target.
Step 4: Let the keys dry between coats. Apply as many coats as you see fit. To stand these babies up so they could dry properly, I put them in little plastic shot glasses.
For my round key, I decided to add some glitter, glitter and a little more glitter. From left to right : Revlon- Sparkling, Orly- Tiara and OPI- Pirouette My Whistle.
Step 5: I applied a layer of Orly- Tiara and then set it in the shot glass to dry.
Step 6: This has all 3 glitters on it. Make sure you set it aside and let it fully dry.
For my square key, I decided to make some leopard spots. Here I have OPI- Siberian Nights and Sinful Colors- Dream On. I also painted on Essie- Pure Pearlfection before I painted on the leopard spots.
Here is the square key with Essie- Pure Pearlfection and Sinful Colors- 24/7
Step 7: Add some random dots with your polish brush. The color used for the spots is Sinful Colors- Dream On.
Step 8: With a small paint brush, paint small lines around your dots. This dark purple is OPI- Siberian Nights.
Step 9: I then took a dotting tool with the same color (OPI- Siberian Nights) and added random dots between the leopard spots.
Step 10: Wait for your polish to dry, and then remove your tape. The tape I used left a little bit of a sticky residue. If your tape left some residue behind, take a cotton swab dipped in alcohol and rub it along the key. The residue will come right up.
I was completely happy with how my keys turned out at this point. Butttt I felt the need to bling them out even more and I happened to have a container of rhinestones in eyesight..
Step 11: Brush a top coat over your entire polish portion of the key. You'll want to do this whether you apply rhinestones or not! While your top coat is still wet, place your rhinestones in random spots on your key. For the leopard print key, I applied rhinestones over top of my small dots.
Step 12: Wait for your top coat to completely dry and you're done!
These keys are so cool and so much fun to make! Part of me wanted to grab my boyfriends keys and go at his but I don't know how he'd explain pink glittery keys to his buddies at work ;) If you decide to try this out, post a picture on Instagram and tag me in it because I'd love to see your creations! ( @aubreyhannah )
Happy polishing!
Aubrey


Super cute! Another great way to use the huge amounts of polish we addicts have ;)
ReplyDeleteBy the way I love your blog! :)
-Elissa
aw thanks for the love! i tried to follow your blog but i am seriously such a rookie with this site! haha
DeleteThey turned out so cute! When I was little I would paint my remotes, tv, desk...haha everything! Love this!
ReplyDelete~stonerella
thanks girly! haha ooo, a pink rhinestone remote and tv sounds pretttyyyy tempting ;) the tv is my boyfriends baby.. wonder what he'd do if he came home to the tv blinged out haha
DeleteHi! Does this eventually crack though? Like how nail polish cracks on nails? :)
ReplyDeleteThey have been great for me so far! No cracks or smudges. Even all of my rhinestones have stayed on! Just be sure you put a thick layer of top coat over your design and you should be set!
DeleteThis is seriously the best idea ever! I'm totally doing this! Thanks for the easy to follow instructions, you're awesome!
ReplyDeleteomg you are genius !
ReplyDelete