Since I've been gone longer than I should have, I'm here with a tutorial for you guys, (it's only fair). I've never done a tutorial on leopard print before because it's really so simple. But I figured I'd show you guys how I create the print. A lot of people do it differently than I do, so by all means, add your own individual touch to it.
This is the pink leopard print mani :

If you'd like to see how I made this, keep on reading!
This is what you'll need:
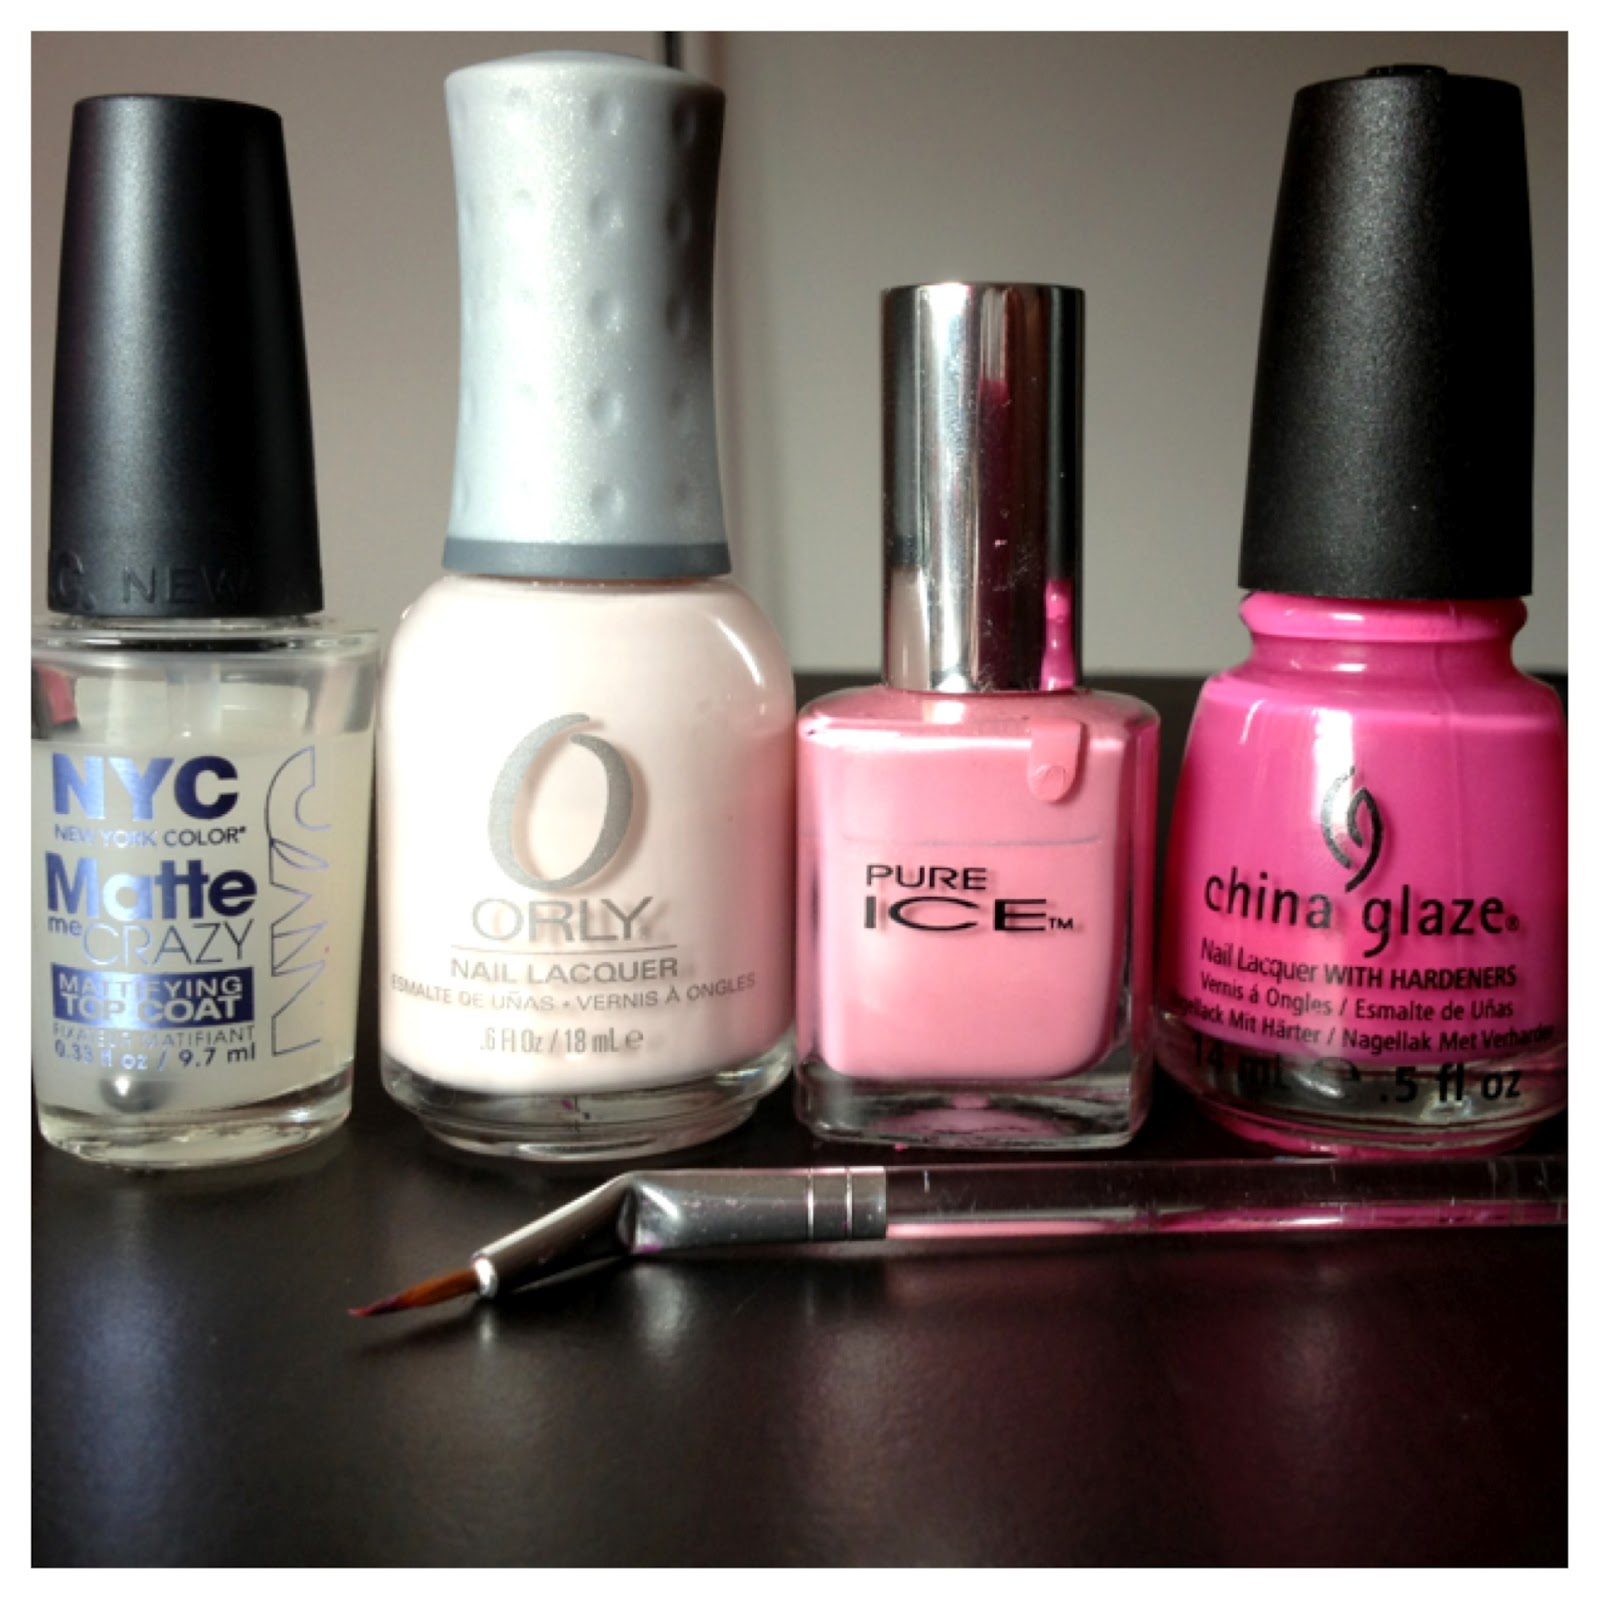
From left to right : NYC- Matte Me Crazy (optional), Orly- Kiss The Bride, Pure Ice- Love and China Glaze- Rich & Famous. I also used a very tiny brush, if you don't have a tiny brush like this, you can use a striper polish.

Step 1: Paint your base color on every nail. I used Pure Ice- Love for my base color. As you can see the application isn't the best. If you run into a problem where the finish isn't as smooth as you'd like it to be, adding a top coat will even everything out for you.

Step 2: For my spots I used Orly- Kiss The Bride. What you want to do is take your paint brush and make small spots in random places on your nail. You want to make sure that your brush doesn't have too much polish on it or you'll end up with globs for spots and you don't want that.


Step 3: If you're using a tiny brush like I am, take your 3rd color and place a few drops onto a piece of paper. Here I'm using China Glaze- Rich & Famous. Dip your brush into the polish.

Step 4: Create a semi-rounded line along one of your spots.

Step 5: Create a 2nd semi-rounded line. You'll want the 2 lines to connect.

Step 6: Create one more line along the bottom of the spot. This time make sure that it doesn't touch your first 2 lines. And there's your spot. Some people prefer to use a dotting tool for this part, some people connect all of the lines. It's personal preference. If you're confused, you can always google a picture of a leopard and mock their print.

Step 7: Now that the first print is done, you'll want to repeat this process with all of your spots. As you can see I've started my first line on my second spot.

Step 8: Create your 2nd line. As you can see I did it a little differently than the first print. My 2 lines are connecting in a downward point. My connecting lines in my first print are in an upward point. You'll want to alternate throughout your spots so they don't look completely uniform.

Step 9: Create your 3rd line, again making sure that it doesn't touch your first 2 lines.

Step 10: Once you've created all of your prints, go ahead and with that same color, add random dots to fill in any open space. You can create these dots with a dotting tool, tooth pick, ball-point pen, whatever you prefer.

Step 11: Once you've completed all of your nails. Add a top coat to seal in your design. Here I used a matte top coat but that's completely optional.
Hope you guys enjoyed this tutorial! As always, feel free to leave any comments/questions below!
Happy Polishing!
Aubrey
Love it! Thank you!
ReplyDeleteYou're welcome! Glad you like <3
DeleteVery cute))
ReplyDeleteThank you!!
DeleteSo cute!! Any tips for doing the right hand? I always do my left hand better but the right side always looks sloppy..
ReplyDeleteThank you! If I do something that's a little time consuming that I know will look awful on the other hand, I usually stick with it as just an accent nail. That way there is only one nail to worry about for each hand.
Delete